I love creating recipes, restaurant reviews and travel guides, but to keep this site going I sometimes feature sponsored posts (which are all clearly marked) and I also use cookies and affiliate links (so if I link to a product I love, and you click my link and buy it, I make a bit of money!) In recent posts these are all clearly marked with *. Please note archive posts are still being updated. Additionally, I use Google Analytics to collect some (anonymised!) data about your visit. You can find out more by reading my Privacy Policy.
By hitting okay and proceeding to my site, you are agreeing to your data being used in this way.
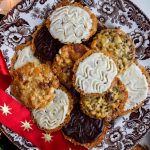
Time for something a little bit retro in my Christmas Kitchen today. As two of the most popular festive recipes here on the blog – Classic Cheese Straws and Mummy’s Mince Pies – are actually my mothers recipes, today I thought I’d share another of her classic Christmas bakes, this time something that she is most likely to pack up in a pretty cellophane bag with lots of ribbon (my Mum is the queen of beautiful gift wrap!) for festive gifting: Chocolate Florentines. These classic Italian wafter biscuits packed with chopped nuts, candied peel and glace cherries, coated on one side with a squiggly layer of chocolate are deceptively easy to make and tend to always to down a storm – when we made this batch to photograph our piano tuner who was visiting could not keep his hands off them, and when she used to make them for Christmas guests at the luxury holiday cottages we used to run, they kept on asking where to buy them, and simply did not believe that something this good was handmade!
We learnt a few things trying to mess around with the recipe before resorting to the barely adapted one from our family baking bible, Mary Berry’s Ultimate Cake Book(ad) – the book I learnt how to make from, splattered with sugar and cake batter, it is one of the things I’d do my best to save if the house was on fire!
First, don’t try to cut down the recipe to make a smaller batch. This recipe may make quite a few florentines, but it is Christmas – they’re designed for sharing! I did try, and while it made just 10 beautiful, lacy crisp florentines, they were actually a bit too lacy, all the chocolate dripped through the holes making them impossible to coat properly! (Though, if you do have this issue I’ve included a few drizzled rather than coated in chocolate in shot, to show that all is not lost and you’ll still end up with pretty, delicious cookies if this is still an issue for you!)
Second, speaking of the chocolate, to cut down on the issue of it dripping through the holes, let it cool before you use the back of a spoon or a palette knife to smooth it onto the flat size of the florentine. Also, work in batches, coating half the florentines in chocolate before using a fork to create the squiggles. You want the chocolate cool enough to be able to draw nice defined lines, but if you coat the whole lot before doing squiggles, a few will have hardened a bit too much and you’ll make a mess! I recommend doing each different type of chocolate in batches.
These easy and very addictive chocolate florentines are great for festive gifting – or to serve after Christmas dinner with a cup of coffee!
Ingredients
Scale
50g (2 oz) Unsalted Butter
50g (2 oz) Demerara Sugar
50g (2 oz) Plain (All Purpose) Flour
50g (2 oz) Golden Syrup
50g (2 oz) Mixed Candied Peel
50g (2 oz) Blanched Almonds
4 Glace Cherries
90g (3 oz) White Chocolate
90g (3 oz) Plain Chocolate
Instructions
Pre-heat the oven to 180 degrees (350 fahrenheit) and line two to three large, non-stick baking trays with baking parchment.
Combine the butter, sugar and golden syrup in a medium saucepan and set it over a medium low heat, stirring occasionally until the butter has all melted.
Meanwhile, finely chop the blanched almonds and cut the glace cherries into eighths – I find if they’re particularly sticky it helps to rinse off any excess sugar syrup under a cold tap and pat them dry on a piece of kitchen paper first!
Remove the pan from the heat, and stir in the flour, chopped nuts, candied peel and chopped cherries until everything is just combined.
Drop teaspoons of mixture onto the baking trays, leaving a good amount of space between them to spread out – I never put more than six on a tray, even if this means I have to work in batches. Try to get them into nice rounds, so you get nice round florentines! Bake in the oven for 8-10 minutes keeping a careful eye on them – you want them to be just golden, and they catch really quickly!
Meanwhile, in two separate heatproof bowls, melt the chocolate. I know some people are happy to do this in the microwave, but I prefer to do it over a pan of simmering water set over a medium heat, the chocolate bowl not touching the water, allowing the steam to gently melt the chocolate. Set the chocolate aside to cool a little.
Remove the florentines from the oven and allow them to cool on the tray for 5 minutes or so, just until they’re stiff enough to be lifted from the tray onto a wire cooling rack without bending! Also, if some have splurged a little and are not perfect circles, working quickly the moment they come out of the oven you can carefully re-shape them a little using a palette knife!
Once the florentines are completely cool, working in batches (see my notes in the post above) using the back of a spoon or a palette knife, spread a generous layer of chocolate on the flat side of each florentine before using a fork to create a few decorative squiggles on the cooling chocolate (see photos) before leaving the chocolate to set.
Notes
We use just almonds as a family preference, but you can use whatever mixture of nuts you like!
I'm a food writer, professional recipe developer and cookbook author living in the English Countryside. I love creating easy, accessable recipes filled with vibrant world flavours that are manageable on busy weeknights. Simple and delicious dinners, from my kitchen to yours!
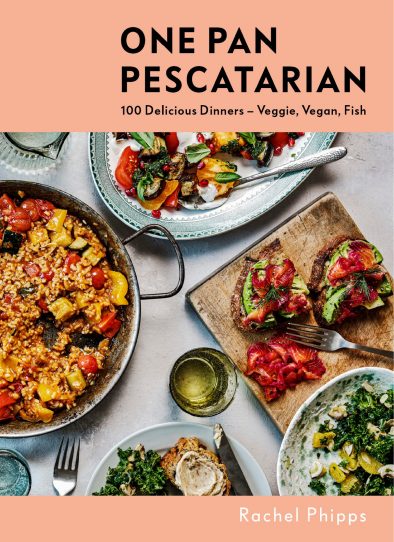
One Pan Pescatarian: 100 Delicious Dinners – Veggie, Vegan, Fish
My second cookbook contains 100 delicious dinner recipes, all of which are either vegetarian, vegan or which celebrate fish and seafood - all cooked in either one pot or one pan.*


Discussion