I love creating recipes, restaurant reviews and travel guides, but to keep this site going I sometimes feature sponsored posts (which are all clearly marked) and I also use cookies and affiliate links (so if I link to a product I love, and you click my link and buy it, I make a bit of money!) In recent posts these are all clearly marked with *. Please note archive posts are still being updated. Additionally, I use Google Analytics to collect some (anonymised!) data about your visit. You can find out more by reading my Privacy Policy.
By hitting okay and proceeding to my site, you are agreeing to your data being used in this way.
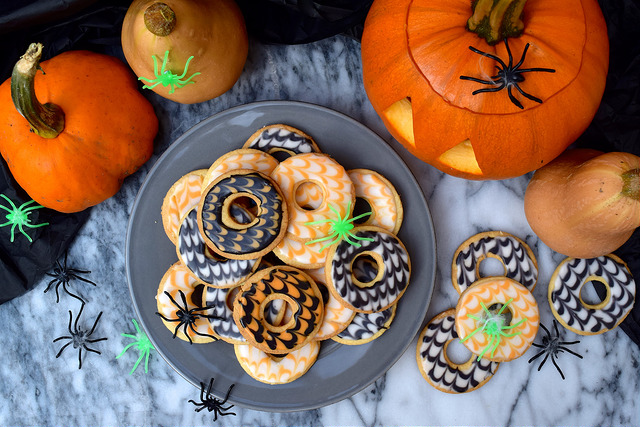
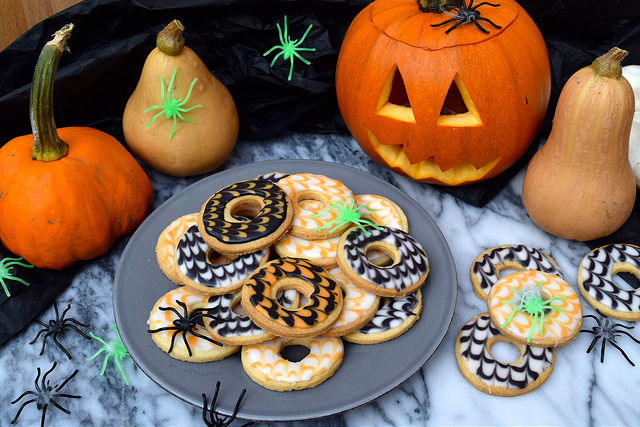
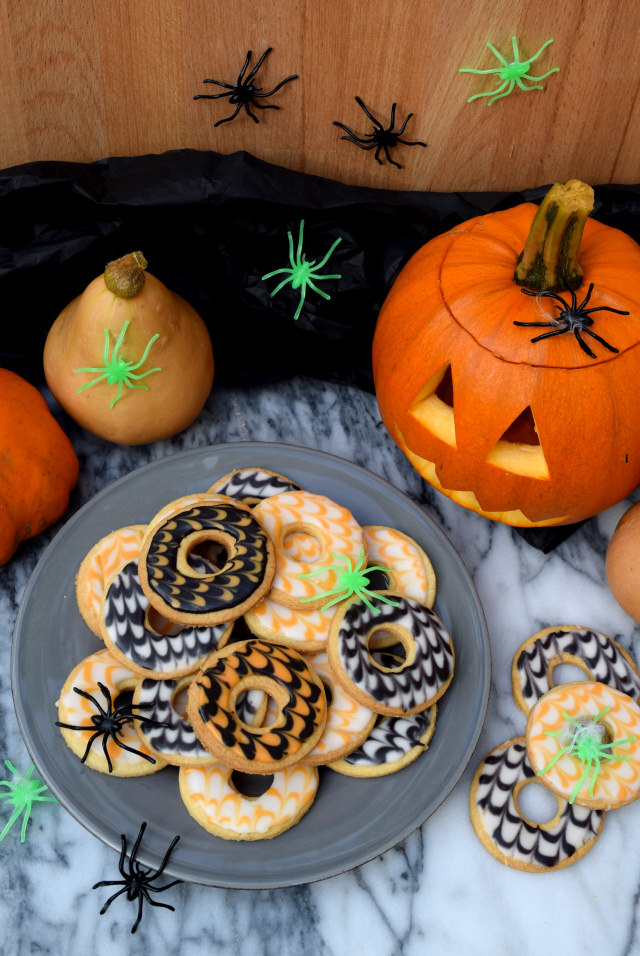
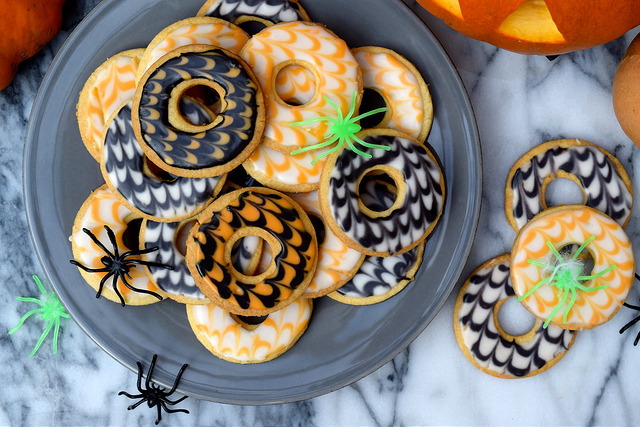
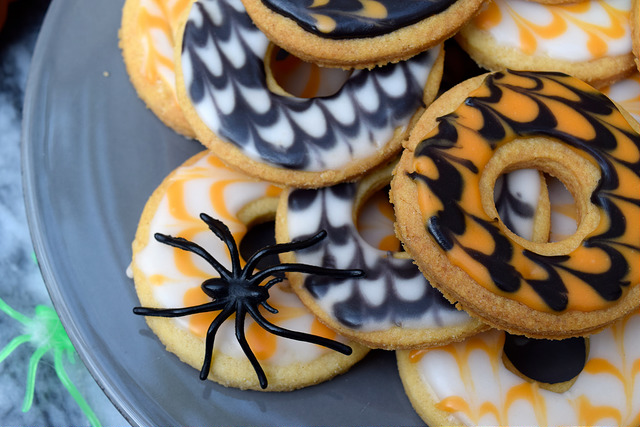
It probably comes as no surprise that someone who was as obsessed as I was with Harry Potter as a kid (okay, I pretty much still am) absolutely loves Halloween. While Halloween does fall on a Saturday this year, I’ve still got a fair bit of work to do. So, to make up for that my colleagues and I have been gorging on these fun, Halloween coloured party rings I’ve been baking and brining into the office over the past week or so.
The recipe is very slightly adapted from James Morton’s fantastic How Baking Works, and of course you can make them in non-Halloween colours for the rest of the year (bright blue works particularly well) – indeed, I encourage it because these biscuits are both fun, fantastically addictive, and if you’re making them for a party you might want a dry run to practice the icing technique. It is pretty easy, but that it is not to say that practice does not make perfect! Will you complain about extra biscuits to eat?
A few notes on equipment and ingredients. As far as cookie cutters, how many biscuits these make depend on what size rings you can find yourself; I make about 24 using a 7.5cm (3 inch) round cookie cutter on the outside, and a 2cm apple corer to make the smaller inside holes. Use what you’ve got, it took me a fair bit of going through drawers looking for something suitably small and round for the middle!
As far as icing, you can use either regular icing which will give a soft finish, or royal icing (you can find it in the same powdered form next to the regular icing in the supermarket) which will be soft at first (and make the biscuits seem a little too sweet), but left overnight will go rock solid and give that perfect ‘party ring’ taste you’re used to from the shop brought versions.
When it comes to food colouring, I usually use and prefer liquid colourings. However, the orange colouring I have is a gel colour as I could not find orange in liquid form in the supermarket. Actually for these biscuits gel icing is better; you may need much more of it to produce a good, solid colour, but it is easier to control to get the colour you want, and makes the icing much more manageable when it comes to decorating your biscuits.
For the decoration itself, be very careful adding the liquid to the icing. If it gets too runny, it will run uncontrollably over the biscuit, but it it is too stiff it will be really hard to manage. Add boiling water little by little, until you’re happy. Now, while I use a teaspoon to spread the base colour of the icing over the biscuit rather than dipping them in the icing (you’ll get too many crumbs in your icing bowl), I’ve tried two different methods for creating the lines on the biscuit which I will then ‘feather’ with a cocktail stick. You can drizzle icing perfectly well in rough lines (which you won’t notice once it is feathered) using another teaspoon, which is the cheaper option, but I find that you get better control and the whole undertaking is much easier if you pipe the lines in disposable piping bags with a very, very small hole cut in the end. Do what works best for you.
Party Rings are so easy to make at home, and look really striking decorated with Halloween coloured icing.
Ingredients
Scale
50g (2 oz) Golden Caster (Granulated) Sugar
100g (3.5 oz) Unsalted Butter, softened
Pinch Salt
1 Large Egg Yolk
1 tsp Vanilla Extract
150g (5 oz) Plain (All Purpose) Flour
25g (1 oz) Cornflour
200g (7 oz) Royal Icing Sugar
Black & Orange Food Colouring
Instructions
Pre-heat the oven to 180 degrees (355 Fahrenheit).
Cream together the sugar, butter, salt, vanilla and egg yolk until smooth.
Add the flour and cornflour, and gently stir in until combined into a dough. Bring together into a ball using your hands.
Lightly flour a clean work surface and roll out the dough until it is about the thickness of a £1 coin. Cut out the rings, laying them on two baking sheets covered in baking parchment.
Bring the dough scraps together carefully (try not to work the dough too much, as this creates tough biscuits) and roll out and cut out ring shapes again until you can’t get any more rings out of the dough.
Bake the biscuits for 8-10 minutes until they are firm but have barely started to turn golden. Allow to cool on the baking sheets completely before decorating.
Mix half the icing sugar with boiling water, adding the water in very small amounts until it is just smooth enough to smooth over the biscuits.
Half the remaining sugar, and do the same, adding orange and black food colouring until you have the preferred colour and consistency.
Doing one biscuit at a time (the icing starts to harden pretty quickly), spread with white icing, pipe or drizzle coloured lines and run the lines through with a cocktail stick.
When the white icing is getting towards the end, I like to switch to using coloured on the bottom, and either more coloured or white to create the lines. I know black on orange works the best, but food colouring gives a slightly artificial flavour to icing, so I find the biscuits taste the best when you use white as the main colour on the base.
Allow the icing to harden overnight if you’re using royal icing.
I'm a food writer, professional recipe developer and cookbook author living in the English Countryside. I love creating easy, accessable recipes filled with vibrant world flavours that are manageable on busy weeknights. Simple and delicious dinners, from my kitchen to yours!
One Pan Pescatarian: 100 Delicious Dinners – Veggie, Vegan, Fish
My second cookbook contains 100 delicious dinner recipes, all of which are either vegetarian, vegan or which celebrate fish and seafood - all cooked in either one pot or one pan.*


Discussion