


Description
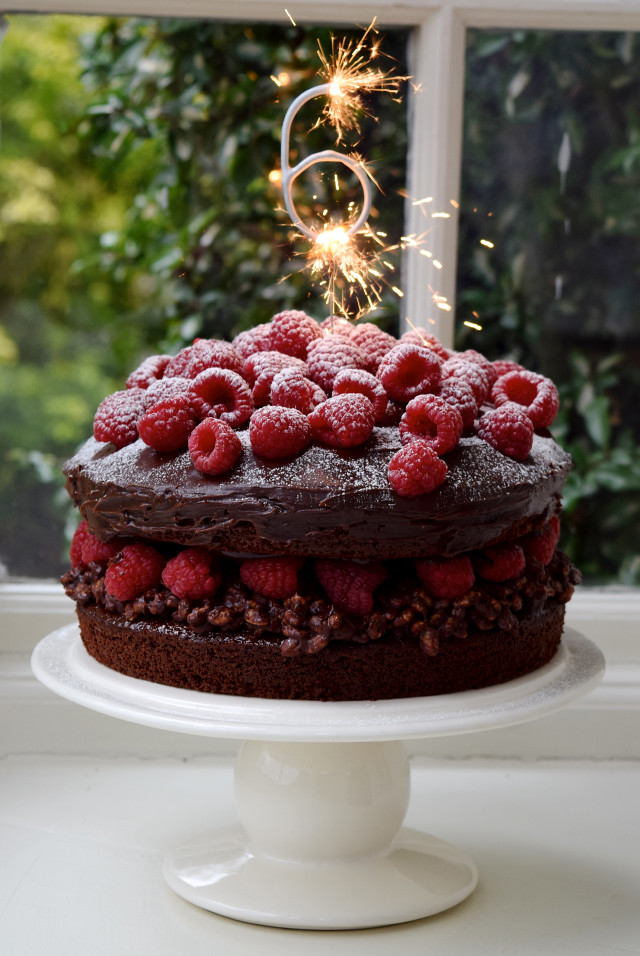
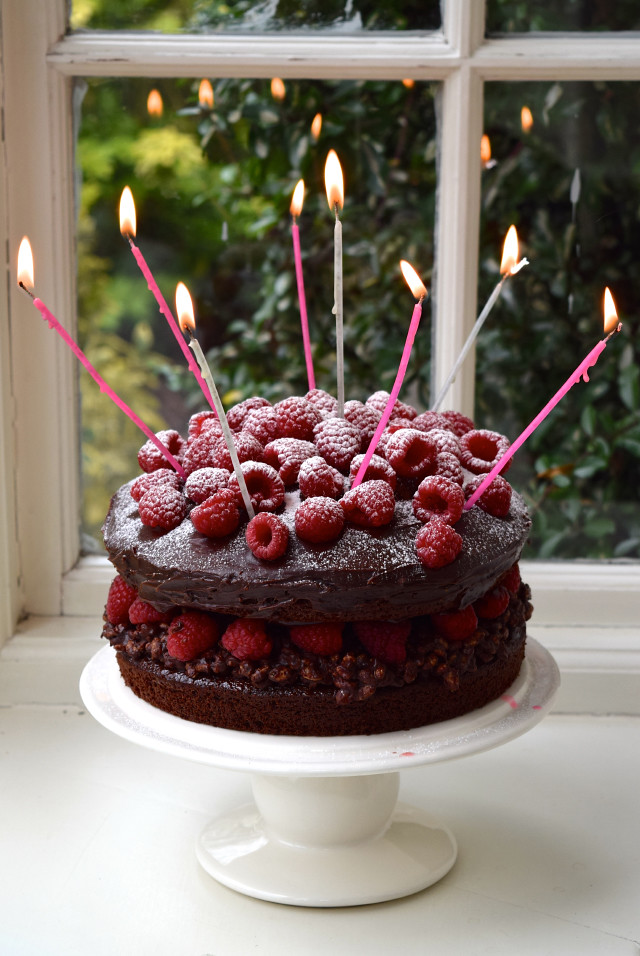
This showstopper cake is perfect for your next celebration, beloved by adults and children alike.
Ingredients
Scale
- 50g (2 oz) Cocoa Powder
- 6 tbsp Hot Water
- 3 Large Eggs
- 120ml (4 fl oz) Whole Milk
- 175g (6 oz) Self-Raising Flour (America? This is how you can make the flour)
- 1 tsp Baking Powder
- 100g (4 oz) Margarine
- 275g (10 oz) Golden Caster Sugar (Granulated Sugar)
- 285g (10 oz) Plain Chocolate (I always use Cadbury’s Bournville)
- 35g (1 oz) Unsalted Butter
- 1/2 tbsp Runny Honey
- 200ml (7 fl oz) Double Cream
- Pinch of Salt
- 50g (2 oz) Rice Krispies
- Apricot Jam
- 350g (12 oz) Fresh Raspberries
- Icing Sugar, for dusting
Instructions
- Pre-heat the oven to 180 degrees (350 fahrenheit) and grease and line with rounds of baking parchment two 8 inch/ 20 cm sandwich tins. Then, make the sponges.
- In a large bowl or food mixer, beat the cocoa power and hot water together until well combined. Add the eggs, milk, flour, baking power, sugar and margarine and beat together until everything is combined.
- Divide the mixture between the two tins, and bake for 25-30 minutes, until you can insert a sharp knife or cake tester and it comes away clean.
- Leave to cook on wire racks, and when the tins are hot enough to handle, run a sharp knife around the edges to release the sponges, and turn them out onto the cooling rack. You’ll want to choose the flattest sponge to keep as your bottom, and the best looking sponge to sit on top.
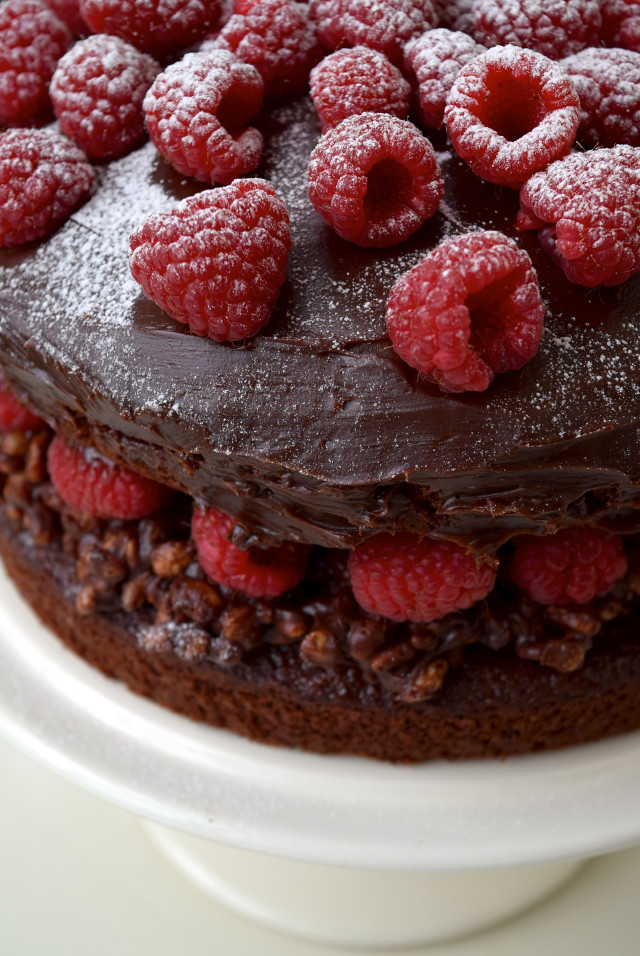
- To make the krispie layer, melt the honey, butter, salt, 50ml (2 fl oz) of the double cream and 150g (5 oz) of the chocolate, broken into small pieces together in a large heatproof bowl over a simmering pan of water until the mixture is smooth and silky. I’ve written more about this technique for melting chocolate here.
- Wait until the mixture is cooler but still smooth and stir-able so you don’t get soggy cereal, and stir the krispies into the mixture until well coated. Form into a ring to set.
- To make the chocolate ganache, use the same bowl method to melt together the remaining chocolate (again broken up into small pieces) and cream until smooth. Allow to cool until the mixture is spreadable, but still quite loose. Chocolate ganache thickens as it cools.
- While it is thickening, melt a couple of heaped tablespoons of apricot jam (this is going to be our glue) in a small saucepan until it is thin, loose and brush-able.
- Now it is time to assemble the cake: your sponges should be cool by now. Place the bottom sponge on your serving plate or cake stand, and generously brush the top with apricot jam. Place the chocolate krispie disk on top, and spread a small amount (not enough so that you would be able to see it from the sides of the cake, but enough so that the raspberries will stick) of chocolate ganache over the top.
- Circle the outside of the cake with raspberries, and scatter a layer inside so they will be throughout the middle of every slice.
- Brush the bottom of your top sponge with apricot jam, and smooth over (I like to use a palette knife for this) just under half of the remaining ganache.
- Carefully flip the sponge onto the cake, so the ganache is sitting on top of the raspberries.
- Brush the remainder of the jam over the top of the cake (using it to fill any cracks that make have formed so the ganache will spread on evenly) and spread the remainder of the ganache over the top, smoothing down the sides a little. S
- catter with the remaining raspberries before the ganache sets, gently pressing them into the cake so they stay put.
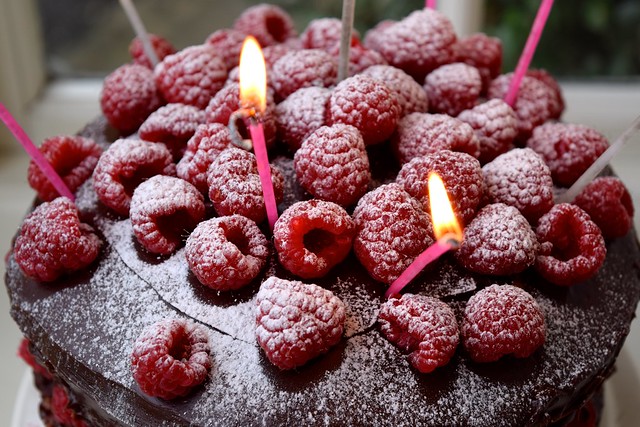
- Dust the top of the cake using a tiny sieve with icing sugar to give the illusion of a light snowfall (it is February, after all) and serve with a glass of pink champagne. It’s a celebration cake, after all.
Notes
Store in a cool place, and consume within a few days (it is made with fresh double cream, after all!)

Discussion